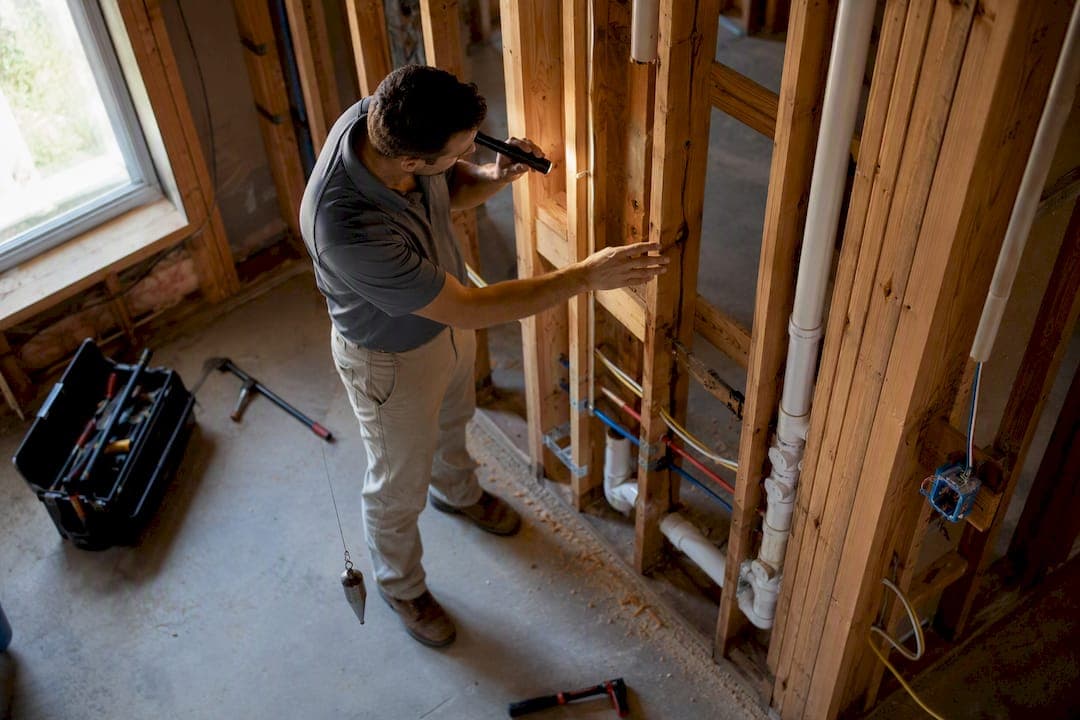
New construction inspections are the contractor-led checks performed at defined build stages, plus the punch-list walkthrough and warranty follow-up, that verify your home meets the plans and building code inspections before each phase gets covered up or the final payment goes out. The pre-drywall inspection matters most because it's your only chance to see framing, wiring, plumbing, and ductwork before drywall hides them for good. Your first move: confirm your contract spells out inspection access, timing, and what documentation the builder owes you after each phase.
- Define your inspection contingency in writing before framing starts.
- Prioritize the pre-drywall inspection over every other phase.
- Request photo-documented reports, not verbal walkthroughs.
Quick fact: A multi-phase inspection package covering foundation, framing, and final walkthrough typically runs $600 to $2,000, while an 11-month warranty inspection generally costs $325 to $1,000.
Key Takeaways
Contractor-led phased inspections, anchored by a pre-drywall check and closed out with a documented warranty inspection, catch defects when they're cheapest to fix and hardest to dispute.
| Point | Details |
|---|---|
| Pre-drywall is the priority | It's the only phase where framing, wiring, plumbing, and ducts are visible before drywall hides them permanently. |
| Contractor drafts the first punch list | The owner and architect then walk the property together to add missed items before final payment. |
| Schedule warranty inspection at month 11 | This leaves time to document issues and file a claim before the correction period closes. |
| Document everything in writing | Photos, exact locations, deadlines, and written builder acknowledgment build a defensible record. |
| Buildwithng manages every phase directly | One accountable team runs foundation through final walkthrough, backed by a workmanship guarantee. |
Table of Contents
- How Do Phased Inspections Fit the Build Schedule?
- Why Is the Pre-Drywall Inspection the One That Matters Most?
- How Does the Punch List and Final Walkthrough Work?
- What Happens During the 11-Month Warranty Inspection?
- How Do You Set Up Contracts and Documentation for Every Phase?
- What Defects Show Up at Each Inspection Phase?
- How Should You Communicate Findings to Your Builder?
- What Are Your Rights If the Builder Won't Fix Inspection Findings?
- The Buildwithng Take on Managing Inspections
- Ready to Build With a Team That Documents Every Phase?
- Sources
How Do Phased Inspections Fit the Build Schedule?
Every new build moves through predictable stages, and each one has a narrow window when problems are cheap to fix. Miss it, and you're paying to open walls back up.
- Foundation. Checked before backfill, this confirms footing depth, rebar placement, and moisture barriers match the engineered plans.
- Framing and pre-drywall. Structural connections, electrical, plumbing, and HVAC rough-ins get reviewed while everything is still exposed.
- Mechanical rough-ins. Electricians, plumbers, and HVAC crews finish their rough work, often overlapping with the framing inspection.
- Insulation. Verified for correct type, coverage, and gaps before the drywall crew shows up.
- Finishes. Cabinets, trim, paint, tile, and fixtures get a cosmetic pass as the home nears completion.
- Final walkthrough. Every system gets tested and every visible defect gets logged before closing.
Catching a duct routing error at framing costs a phone call. Catching it after drywall costs a demolition crew.
Why Is the Pre-Drywall Inspection the One That Matters Most?
Pre-drywall is the single highest-value inspection in the entire build, and it isn't close. It's the only point where you can physically see the studs, joists, wiring runs, plumbing lines, and duct paths before they disappear behind gypsum board for the life of the house. LegalClarity's breakdown of new construction inspections confirms that issues caught at this stage cost a fraction of what the same fix requires once walls are closed.
An independent set of eyes at this stage also catches what a builder's own crew might miss, since framers and trade contractors are usually working against a schedule, not a checklist. Prospective Home Inspections notes that this kind of oversight creates a documented record that belongs to you, not to a permit file somewhere at the county office.
Your pre-drywall inspection checklist should cover:
- Framing connections at load points, headers, and hurricane straps or ties.
- Flashing details around windows, doors, and roof penetrations.
- Wiring protection where cables run through studs or near metal edges.
- Plumbing slope and support, checked for proper pitch and adequate hangers.
- Duct routing for kinks, disconnected joints, or undersized runs.
- Site grading to confirm water drains away from the foundation, not toward it.
Two tests are worth running at this stage even before final. A multi-fixture plumbing test, where several fixtures run simultaneously, can expose pressure drops or leaks that a single-fixture check would miss. An HVAC supply-and-return temperature check, even in rough form, can flag an undersized system months before summer proves it the hard way.
Pro Tip: Ask your inspector for a report with photos tied to exact locations, not just descriptions. "Wiring exposed near stud, north wall, bedroom 2" with a photo attached gets fixed faster than "some wiring issues noted."
Insist on corrective action items with deadlines, and don't sign off on the phase until you get a written re-check confirming the fix.
How Does the Punch List and Final Walkthrough Work?
The punch list is the contractor's job to start. Once the builder believes the work is substantially complete, they compile the initial list of outstanding items. On projects that follow AIA-style contract language, the contractor is contractually required to prepare that first list, and the owner and architect (if one is involved) then walk the property together to add anything missed.
That walkthrough should happen at the final inspection, when systems get operational testing, not just a visual once-over. Run every faucet, flip every switch, cycle the HVAC, and open every door and window. Cosmetic issues matter, but functional failures matter more.
A few things to keep straight during closeout:
- Punch list items are not change orders. A punch item corrects work that doesn't match the contract; a change order adds new scope.
- Completion windows run 30 to 60 days for most punch items, depending on material lead times and trade availability.
- Retainage (a percentage of final payment withheld until completion) gets released once the punch list closes, not before.
- Closeout documents should include as-built drawings, operation and maintenance manuals, and all warranties.
Rolling punch lists, where deficiencies get logged and assigned continuously rather than saved for one big list at the end, cut down on last-minute scrambling and reduce disputes over what was actually promised.
For documentation, insist on:
- Photo evidence for every item, timestamped.
- A named responsible party for each fix.
- A due date attached to every open item.
- Written acknowledgment from the builder once each item closes.
Skip any of this, and you're negotiating from memory instead of from a paper trail.
What Happens During the 11-Month Warranty Inspection?
Most builder warranties run twelve months, and the smart move is scheduling your inspection at month eleven, not month twelve. That timing gives you a documented report and enough runway to file a claim before the correction period closes.
This inspection exists to catch what only shows up after a house has lived through a full cycle of seasons. Lumber keeps drying, concrete keeps curing, and soil keeps settling for months after occupancy. LegalClarity's guide to post-occupancy inspections lists drywall cracks, nail pops, sticking doors and windows, and minor plumbing leaks as the most common symptoms that surface during this window.
Not every crack is warrantable. This is where the NAHB Residential Construction Performance Guidelines earn their keep as an objective reference point. They set measurable tolerances for things like drywall cracking, floor unevenness, and door alignment, so you're not arguing opinion against opinion with your builder.
Quick fact: An 11-month warranty inspection typically costs $325 to $1,000, a small price against the repairs it can catch before your correction window closes.
To turn findings into an actual claim:
- Get a written inspection report with photos and specific locations.
- Submit formal written notice to the builder, not a phone call or text.
- Request a re-inspection or photo verification once repairs are made.
How Do You Set Up Contracts and Documentation for Every Phase?
Your contract should do the heavy lifting before the first inspection ever happens. Build in an inspection access clause that names each phase, states who pays for what, and sets a response time for corrections, ideally 10 to 14 business days for non-structural items.
- Write the phases into the contract, naming foundation, framing, mechanical, insulation, and final as distinct milestones.
- Bundle inspections into one package when possible. Buying phases together often costs less than paying per visit and keeps the same inspector's eyes on the whole project.
- Request written acknowledgment from the builder after every report, confirming they received it and agree to the findings.
- Preserve every timeline. Save dated emails, reports, and photos in one folder from day one.
Pro Tip: Schedule your inspection the same week as the trade's rough-in completion, not weeks later. Waiting gives the crew time to move on and makes revisits harder to arrange.
Budget-wise, a full multi-phase package runs $600 to $2,000 depending on home size and region, while single-phase visits cost less individually but add up fast if bought separately.
What Defects Show Up at Each Inspection Phase?
Foundation problems usually show up as uneven footing depth, missing rebar, or gaps in the moisture barrier. These are easy to spot visually before backfill covers them, but nearly impossible to verify afterward.
At framing and pre-drywall, watch for missing hurricane straps, undersized headers over openings, and wiring stapled too tightly against studs. Plumbing defects at this stage often look like reversed slope on drain lines or missing pipe supports, both of which cause slow drains or sagging lines later.
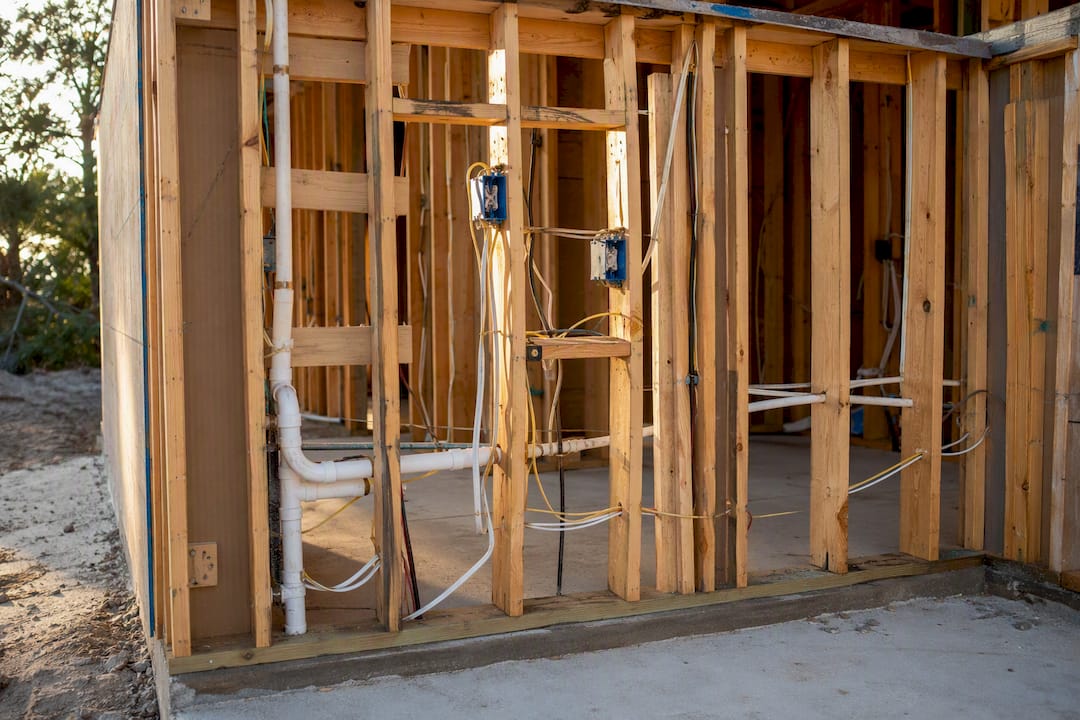
Mechanical rough-ins hide their own set of issues. Disconnected duct joints, kinked flexible ductwork, and returns placed too close to supply lines all reduce system efficiency long before anyone notices a comfort complaint.
Insulation defects are often about coverage gaps rather than material failure: missing insulation behind electrical boxes, compressed batts, or gaps around plumbing penetrations. A thermal camera catches these faster than the naked eye.
At final walkthrough, functional defects matter more than cosmetic ones. Doors that don't latch, GFCI outlets that don't trip, and HVAC zones that don't reach set temperature all point to problems that were baked in earlier and only now become visible under real use.
How Should You Communicate Findings to Your Builder?
Put every finding in writing, even when the conversation happens face-to-face on site. A verbal agreement to "take care of it" has no paper trail if the item never gets fixed.
Frame issues around the contract and the plans, not opinion. "This doesn't match the approved framing plan on sheet A-4" lands differently than "this looks wrong to me." Specificity keeps the conversation productive instead of defensive.
Give the builder a reasonable window to respond, typically the 10 to 14 business days you set in your contract, and follow up in writing if that window passes without action. A calm, documented follow-up email carries more weight later than an angry phone call ever will.
When you disagree about whether something is a defect or acceptable variance, ask for the NAHB Residential Construction Performance Guidelines or a similar objective standard rather than trading opinions back and forth. Most reasonable builders will work from an agreed standard rather than argue against it.
Keep escalation proportional. Minor items can wait for the punch list. Structural or safety concerns, like missing straps or undersized headers, deserve an immediate written notice and a request for a stop on that portion of work until it's resolved.
What Are Your Rights If the Builder Won't Fix Inspection Findings?
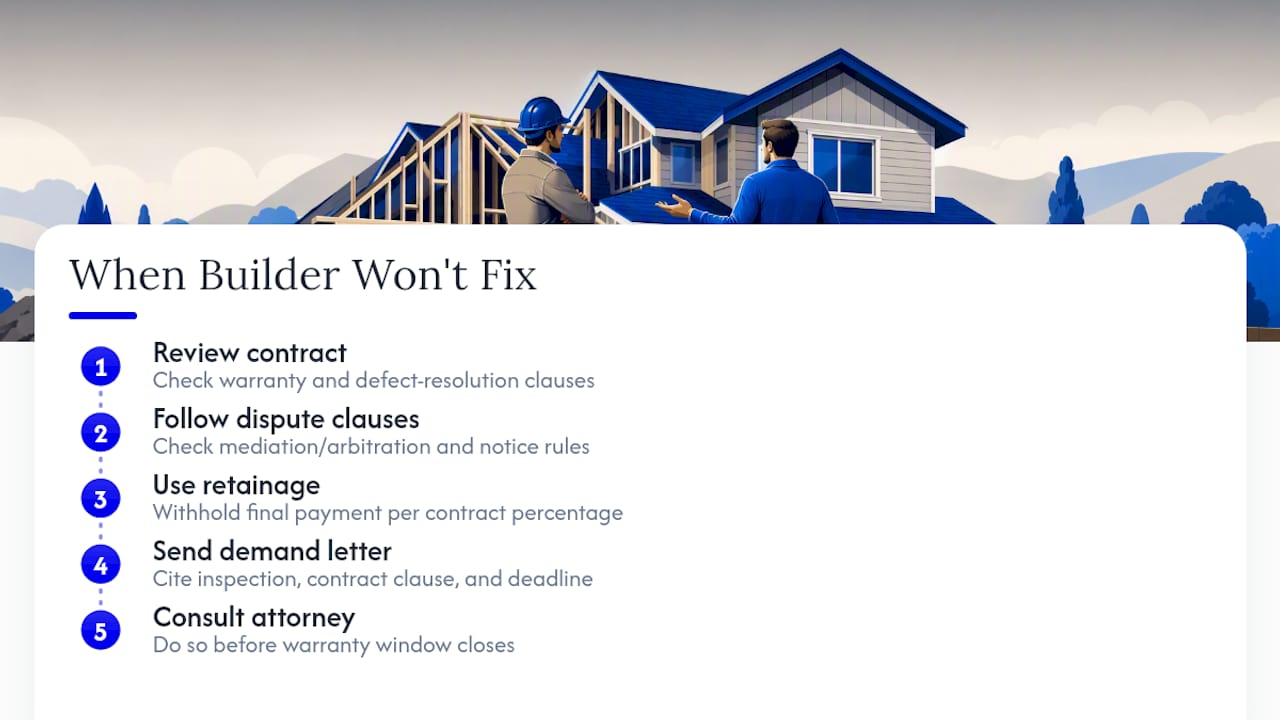
Most residential construction contracts include a correction period and a defined process for disputed work, so your first stop is always the contract itself. Read the warranty and defect resolution clauses closely before assuming you need outside help.
If the builder ignores documented, contract-supported findings past the agreed response window, you generally have a few paths forward. Many contracts require mediation or arbitration before litigation, so check for that clause before contacting an attorney. Some states also require a formal notice-and-opportunity-to-cure letter before you can pursue further action, so timing and format matter.
Retainage is your practical leverage. Withholding final payment for unresolved punch list items is standard practice, but only up to whatever percentage your contract specifies, so confirm that number before closeout begins.
For serious or structural defects, a written demand letter referencing your inspection reports, the contract clause in question, and a firm deadline often resolves things without further escalation. If it doesn't, consulting a construction attorney familiar with your state's laws is worth the cost before the warranty window closes. Waiting past that window can forfeit your claim entirely, so timing matters as much as documentation.
The Buildwithng Take on Managing Inspections
Most closeout disputes trace back to one thing: nobody wrote anything down until it was too late to matter. NG Construction SWFL builds every custom home and renovation across Cape Coral, Fort Myers, Naples, Bonita Springs, and Estero around full-phase project management, starting with a free estimate and running straight through the workmanship guarantee that backs the final walkthrough.
That means the same team managing your foundation inspection is still accountable at your 11-month checkup. Fewer handoffs mean fewer excuses, and a documented process at every phase means fewer callbacks once you've moved in. Ask for examples of past projects and you'll see the same phased discipline applied whether it's a kitchen remodel or a full custom build.
— Alston
Ready to Build With a Team That Documents Every Phase?
There's a real difference between hiring a builder who allows inspections and hiring one who builds the process around them. Buildwithng is that second kind of builder for Southwest Florida homeowners planning a custom home, renovation, or commercial build-out. Every phase, from foundation to final walkthrough, gets managed under one team with one point of accountability, backed by a workmanship guarantee instead of a shrug when something surfaces later.

NG Construction SWFL documents each phase inspection with photos and specific corrective actions, then carries that same paper trail into punch-list resolution and warranty follow-up, so nothing gets lost between the framing crew and the final signature. If you're planning a build in Cape Coral, Fort Myers, Naples, Bonita Springs, or Estero, request a free estimate and see how a fully managed build process handles the inspection schedule for you from day one.
Sources
- New Construction Home Inspections: Pre-Drywall to Final - LegalClarity
- Why a Pre-Drywall Inspection Is Crucial Before Walls Go Up | Prospective Home Inspections
- The Construction Punch List Process Explained
- Construction punch lists: The ultimate guide to project closeout