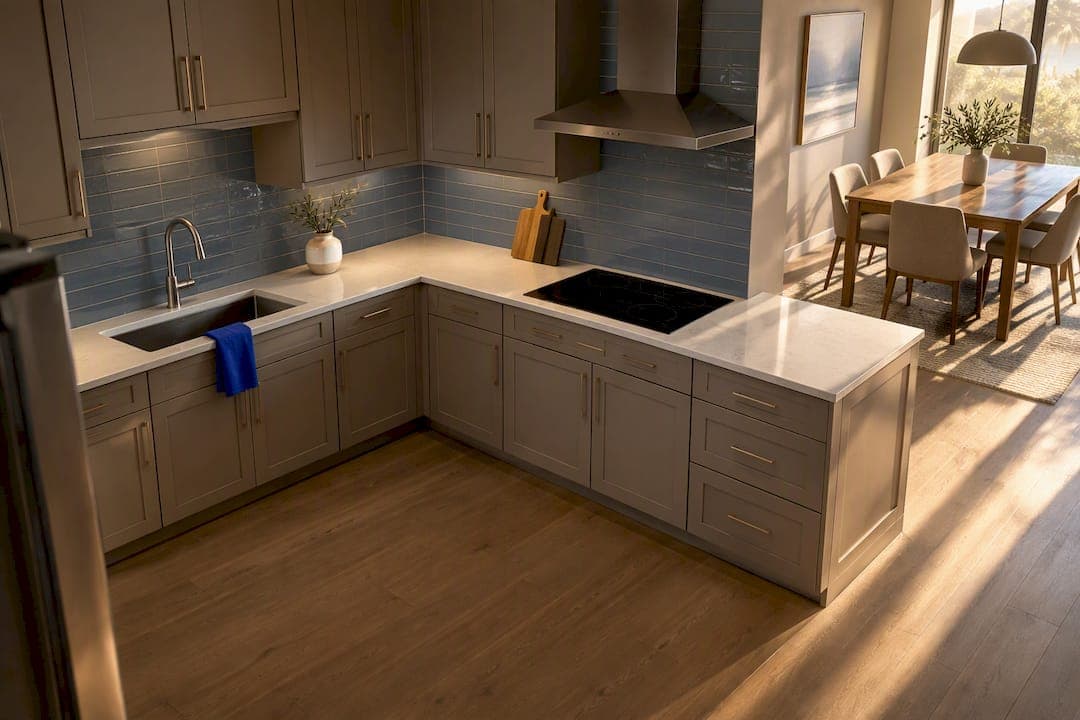
Every kitchen layout falls into one of six proven patterns: one-wall for tight footprints, galley for narrow rooms and fast workflows, L-shaped for open-plan flexibility, U-shaped for serious storage and counter space, G-shaped or peninsula for a hybrid of both, and island or open-concept layouts for households that cook and entertain at once. The right choice depends less on style preference and more on your room's dimensions, how many people cook at once, and whether you want the kitchen open to the rest of the house.
TL;DR:
- A two-cook household should prioritize wider aisles of at least 48 inches and parallel zones to ensure efficient movement and workflow.
- U-shaped kitchens require a minimum aisle width of 42 to 48 inches, with a 60-inch turning diameter for accessibility, especially in enclosed or larger rooms.
- An island must have at least 42 inches of clearance on all sides to support safe and comfortable multi-person circulation during meal prep and social activities.
- Moving major appliances or altering layouts often involves complex plumbing, electrical, or structural work that can significantly increase project costs and duration.
- Planning a kitchen based on zones rather than the traditional triangle improves functionality for modern households with multiple cooks and activity centers.
Table of Contents
- What Makes a Kitchen Layout Work (It's Not Just the Triangle)
- One-Wall Kitchen: Compact Living Without the Clutter
- Galley Kitchen: Speed and Efficiency in a Narrow Room
- L-Shaped Kitchen: The Flexible Middle Ground
- U-Shaped Kitchen: Maximum Counter Space, With Conditions
- G-Shaped and Peninsula Kitchens: The Hybrid That Splits the Difference
- Island and Open-Concept Kitchens: Built for Entertaining and Multiple Cooks
- Choosing Your Layout: A Framework You Can Actually Use
- The Planning Numbers Professionals Actually Use
- What Renovators Learn the Hard Way About Layout Changes
- A Builder's View: Zones Are Winning, and for Good Reason
- Ready to Turn Your Layout Plan Into a Real Kitchen?
- Where These Planning Standards Come From
- Sources
- FAQ
What Makes a Kitchen Layout Work (It's Not Just the Triangle)
A kitchen layout is the arrangement of cabinets, appliances, and open space that determines how you move while cooking, cleaning, and storing food. For decades, designers leaned on the "kitchen work triangle," the idea that the sink, stove, and refrigerator should form an efficient triangle with no leg longer than about 9 feet. That concept still has value, but it assumes one cook working alone, and that's not how most households function anymore.
Modern kitchens are better planned around zones. Instead of three points, you're organizing five functional areas that can overlap, repeat, or expand depending on your household:
- Prep zone: counter space near storage for cutting boards, mixing bowls, and small appliances
- Cooking zone: the range or cooktop, with heat-safe counter space on at least one side
- Cleaning zone: sink, dishwasher, and trash/recycling within a few steps of each other
- Storage zone: refrigerator, pantry, and everyday dishware, positioned for easy restocking and retrieval
- Social zone: seating, secondary counters, or a coffee station where guests or family linger without crowding the cook
Zone-based planning matters more now because kitchens host more simultaneous activity than they did when the triangle concept took hold. A common framing in kitchen design guides still organizes layouts into the same six categories, but increasingly recommends zones over strict triangle geometry, especially for households with two cooks, a dedicated baking station, or a beverage bar. If you bake often, you might need a second prep zone near the oven. If two people cook on weeknights, you need parallel zones that don't force people to cross paths constantly. That's the real planning question behind every layout decision that follows.
One-Wall Kitchen: Compact Living Without the Clutter
A one-wall kitchen runs every appliance, cabinet, and counter along a single wall, which makes it the default choice for studio apartments, small condos, and open-concept homes where a separate kitchen room isn't in the budget or the footprint. You'll see this layout most in homes under 1,000 square feet or in accessory dwelling units where square footage is at a premium.
The sequence along that wall matters more than in any other layout, since there's no second run to fall back on. A practical order runs refrigerator, then counter space for unloading groceries, then sink, then a short stretch of counter, then the range, with the microwave positioned above or nearby without breaking the flow. Keep at least one landing area of 15 to 18 inches beside the sink and range so hot pans and wet dishes have somewhere to go.
- Pros: low cost, easy to install, works in almost any small footprint, simple to keep clean
- Cons: limited storage, minimal counter space, awkward for two cooks, no natural separation between zones
Pro Tip: If your one-wall kitchen backs onto an open living area, add a rolling cart or slim console table across from the wall. It gives you extra landing space during meal prep without permanently narrowing the walkway.
Galley Kitchen: Speed and Efficiency in a Narrow Room
A galley kitchen places two parallel counter runs facing each other, typically in a corridor-style room between 7 and 10 feet wide. It's the layout you'll find in older urban apartments, ship galleys (hence the name), and any home where the kitchen occupies a narrow, enclosed space rather than an open floor plan.
Efficiency is the galley's biggest selling point. Because everything sits within a step or two, cooks often move less in a galley kitchen than in any other layout. The trick is splitting functions between the two runs. One side typically holds the range, prep counter, and pantry storage; the other holds the sink, dishwasher, and refrigerator. That way, the "wet" cleanup tasks and "dry" cooking tasks don't collide in the same 3-foot strip.
Aisle width is where galley kitchens succeed or fail. The NKBA's planning guidelines recommend a minimum work aisle of 42 inches for one cook and 48 inches for multiple cooks, and going narrower than that turns every pass-through into a bottleneck.
- Pros: highly efficient, compact footprint, good storage-to-space ratio
- Cons: can feel cramped with two cooks, often has only one entry/exit point, limited social interaction with the rest of the home
L-Shaped Kitchen: The Flexible Middle Ground
An L-shaped kitchen runs cabinets and counters along two adjoining walls, leaving the rest of the room open. This is the layout that shows up most often in open-concept renovations, because the open leg of the "L" can face straight into a living or dining area without walling off the cook from the rest of the house.
The open corner is also where L-shapes earn their flexibility. Many homeowners use that space to add a kitchen island or a peninsula, turning a standard L into a hybrid layout with extra prep space, seating, or a second sink. If you're adding an island, leave at least 42 inches of clearance on all sides so the aisle stays walkable during meal prep, a figure echoed across common kitchen design references.
The corner where the two walls meet is the layout's weak point. A blind corner cabinet wastes deep storage space unless you install a lazy Susan or a pull-out corner system, and traffic flow suffers if a doorway or walkway cuts across the inside of the L.
- Pros: adaptable to open floor plans, works with or without an island, good natural light exposure on the open side
- Cons: corner storage requires special hardware, can create long walking distances if the L is oversized, less defined zone separation than a U-shape
U-Shaped Kitchen: Maximum Counter Space, With Conditions
A U-shaped kitchen wraps counters and cabinets around three walls, giving you more continuous counter and storage space than almost any other standard layout. This is the layout of choice for larger kitchens, dedicated cooking rooms, and households that want a fully enclosed workspace separate from the rest of the home.
The continuous run is the U-shape's main advantage: you get storage and counter space on three sides without walking far between zones. But that same enclosed geometry creates the layout's biggest constraint, which is aisle width and turning radius. The NKBA recommends the same 42 to 48 inch aisle standard here that applies to galley kitchens, but a U-shape needs it on all three legs, not just one.
This is also where accessibility planning becomes non-negotiable rather than optional. The Fair Housing Accessibility Guidelines call for a 60-inch turning diameter in some U-shaped kitchens, since a tight three-wall enclosure can trap a wheelchair user or anyone using a mobility device if the aisle is undersized. If you're planning a U-shape in a smaller room, check that dimension before you finalize cabinet layouts, not after.
- Pros: maximum counter and storage space, clearly defined enclosed workspace, good for multiple cooks if aisles are wide enough
- Cons: requires a larger room, corner storage challenges on two sides instead of one, can feel closed off from open-concept living areas
G-Shaped and Peninsula Kitchens: The Hybrid That Splits the Difference
A peninsula kitchen extends a counter from one wall into the room, connected on one end but open on the other three sides, unlike a freestanding island. A G-shaped kitchen takes that same idea further, wrapping counters around four sides instead of three, which gives you nearly U-shape storage with a peninsula's connection to open living space.
Peninsulas make sense when your room is too narrow for an island's full clearance requirements but you still want extra counter space and a spot for casual seating. Because one end attaches to existing cabinetry, a peninsula typically costs less to add during a renovation than a freestanding island with its own plumbing or electrical runs.
Seating usually goes on the open side facing the living or dining area, while the attached side handles prep or cleanup tasks. Placing the cooktop directly on the peninsula's open side can create a pinch point where people gather to chat right where the cook needs room to move, so many designers push the range toward the back wall and keep the peninsula's open face for seating or a secondary prep surface instead.
- Pros: extra counter space without an island's full clearance needs, natural connection point between kitchen and living space, lower renovation cost than adding an island
- Cons: can create a traffic pinch point near seating, less flexible than a full island for multi-person cooking, G-shapes can feel enclosed in smaller rooms
Island and Open-Concept Kitchens: Built for Entertaining and Multiple Cooks
An island works as a freestanding block of counter space, storage, or seating, fully surrounded by walkway on all sides, and it only makes sense once your room has the square footage to support it. As a baseline, plan for at least 42 inches of clearance around every side of the island, a figure that shows up consistently in kitchen design planning resources as the minimum for comfortable multi-person circulation.
The biggest decision with any island is what function it serves. Putting the cooktop on the island centers the cook in the middle of social activity, which some homeowners love and others find distracting when guests hover too close to an open flame. Placing the sink there instead tends to strike a better balance, since cleanup tasks are lower-risk to interrupt and it still gives the cook a reason to face the room rather than a wall. Seating-only islands, with no plumbing or cooking appliances at all, are the simplest and cheapest to build.
Sightlines matter here in a way they don't with enclosed layouts. If your range hood sits above the island, make sure it doesn't block the view into the living or dining area, since an open-concept kitchen's whole appeal depends on that visual connection staying intact.
Pro Tip: Orient island storage, drawers, cabinets, shelving, toward the kitchen side rather than the living room side. It keeps the mess-prone storage out of view while the social-facing side of the island stays visually clean for guests.
- Pros: supports multiple cooks and social interaction, adds significant counter and storage space, defines zones without walls
- Cons: requires substantial square footage, plumbing/electrical relocation adds cost, poor placement can create safety or sightline issues
Choosing Your Layout: A Framework You Can Actually Use
Picking a layout starts with measuring what you have, not what you want. Walk into your kitchen with a tape measure and note your room's width, the location of windows and doorways, and where plumbing and gas lines currently run, since moving them adds cost fast.
- Map your footprint and openings. Note wall lengths, door swings, and window placement before you consider any layout, since a doorway in the wrong spot can eliminate a U-shape or peninsula entirely.
- Count your cooks and habits. A household with two regular cooks needs wider aisles and possibly parallel zones (galley or U-shape), while a single-cook household has more layout flexibility.
- Rank your priorities. Decide whether storage, social connection, or workflow speed matters most, then match that priority to the layout built for it: U-shape for storage, island for social connection, galley for speed.
- Estimate renovation complexity. A one-wall or galley update that keeps existing plumbing and electrical in place is far less invasive than converting a closed kitchen into an open-concept L-shape with a relocated island.
- Bring questions to a contractor, not just a wish list. Ask what's load-bearing, what permits your project requires, and whether your gas, electrical, and ventilation lines can support your appliance plan without major rerouting.
Pro Tip: Before you fall in love with a layout on Pinterest, ask a contractor to walk your space in person. Photos don't show you where a support beam or a gas line will quietly veto your dream island.
If your project involves moving major appliances or opening up walls between rooms, that's the point where hiring design-build help stops being optional. A contractor who manages design and construction under one roof can catch structural or code conflicts before they become expensive change orders mid-project.
The Planning Numbers Professionals Actually Use
Homeowners often skip straight to style choices, cabinet colors, countertop material, backsplash pattern, without locking down the dimensions that make a layout function at all. The NKBA's planning guidelines set the baseline that most kitchen designers still work from today.
- Work aisle width: 42 inches minimum for a single cook, 48 inches minimum where two or more people cook regularly, per NKBA planning standards
- Landing areas: NKBA guidance calls for dedicated counter space beside the refrigerator, oven, microwave, and cooktop so hot dishes and groceries have somewhere to land
- Clear floor space at fixtures: the Fair Housing Accessibility Guidelines require a minimum 30-inch by 48-inch clear floor space at each kitchen appliance or fixture
- Turning diameter: some U-shaped kitchens require a 60-inch turning circle under the same Fair Housing guidance, a figure that matters most in enclosed three-wall layouts
- Approach orientation: the Access Board's clearance guidance distinguishes forward approaches, needed at sinks and most work surfaces, from side approaches, and requires centered clear floor space at certain fixtures
Some state and local codes go further than federal guidance. Massachusetts, for instance, specifies countertop heights no higher than 34 inches and defined knee space minimums for kitchens covered under its accessibility rules. Local codes can be stricter than federal minimums, so check with your permitting office before finalizing cabinet heights or aisle widths, especially if your renovation involves a permit application.
For flooring transitions between kitchen and adjoining rooms, keeping the route level and continuous matters just as much as counter clearances. Guidance on ADA-compliant flooring transitions covers the threshold heights and materials that keep a kitchen's entry point from becoming an accessibility gap on its own.

What Renovators Learn the Hard Way About Layout Changes
Every layout change looks simple on paper until a contractor opens a wall. Moving a sink means moving a drain line, which often means cutting into a slab or crawling under a house to reroute plumbing. Relocating a range means checking whether your gas line reaches the new spot or whether you're switching to electric, and moving a range hood means resizing or rerouting ductwork, one of the most consistently underestimated costs in a kitchen remodel.

A design-build approach handles these surprises before they become budget blowouts, because the same team that draws the plans is the team pouring the concrete and running the wiring. Buildwithng's process centers on that kind of accountability: one team managing design, permitting, and construction from the first blueprint to final inspection, backed by free estimates and a workmanship guarantee on the finished project.
Timeline and cost on a layout change depend heavily on what's behind the walls. A cosmetic refresh that keeps your existing footprint might take weeks; a full layout conversion involving structural changes, new plumbing runs, or electrical panel upgrades takes considerably longer and requires more coordination between trades. Sustainable material choices and finish coordination, cabinet lines that match your flooring transition, lighting that matches your new zone layout, matter more once you're committing to a layout that will define how your kitchen functions for years.
A Builder's View: Zones Are Winning, and for Good Reason
The shift from triangle to zones isn't a design trend. It's a response to how people actually cook now, with more households running two income earners who both cook, more home offices next to kitchens, and more multigenerational households sharing one workspace. Layouts that assume a single cook working alone are increasingly the exception, not the rule.
If you're a solo cook in a small space, a one-wall or galley layout will serve you better than a bigger, more expensive layout you don't need. If you're a two-cook household, prioritize aisle width and parallel zones over square footage alone. If entertaining matters most, an island with the sink rather than the cooktop gives you social connection without putting the cook at risk near an open flame.
Bring three things to your first contractor meeting: your room's exact measurements, a list of who cooks and how often, and your top priority, whether that's storage, speed, or social space. Everything else in the planning process follows from those three answers.
— Alston
Ready to Turn Your Layout Plan Into a Real Kitchen?
Kitchen layout changes are best handled starting with zones and clearances, not just style preferences. A design-build contractor manages the entire process under one accountable team: design, permitting, plumbing and electrical coordination, and final inspection, so a layout change doesn't turn into three separate contractors pointing fingers at each other.

Whether you're converting a closed one-wall kitchen into an open-concept L-shape, adding an island with proper clearances, or planning a full kitchen and bath remodel, Buildwithng's kitchen and bath remodeling and room addition services cover the structural, plumbing, and permitting work a layout change actually requires. Every project starts with a free, no-obligation estimate and is backed by a workmanship guarantee, so you know what you're getting before you commit. If your kitchen's layout is holding your home back, request your free estimate and start the conversation with a team that manages the whole project, not just one piece of it.
Where These Planning Standards Come From
The clearances and accessibility figures in this guide come from the industry's most consistently cited planning sources. The NKBA Kitchen Planning Guidelines set the practical standard for work aisles, landing areas, and appliance placement that most residential designers still follow. The Fair Housing Accessibility Guidelines establish the 30 inch by 48 inch clear floor space and 60 inch turning diameter requirements that apply to covered housing. The Access Board's clearance chapter defines forward and side approach standards for fixtures and operable parts referenced throughout federal accessibility guidance.
Sources
- Fair Housing Accessibility Guidelines (HUD) — Chapter 7: Kitchens
- Access Board: Clear floor or ground space and turning space (Chapter 3)
- NKBA Kitchen Planning Guidelines with Access Standards
- Kitchen layout guide — RoomSketch3D
FAQ
What Are the Six Basic Kitchen Layouts?
The six standard layouts are one-wall, galley, L-shaped, U-shaped, G-shaped/peninsula, and island or open-concept. Most kitchen design guides organize layouts into this same set, with variations mainly coming from how islands or peninsulas get combined with an L or U base shape.
What Are the Three Main Kitchen Layout Types?
If you narrow the list to the most common footprints, the three you'll see most often are galley, L-shaped, and U-shaped, since these three cover the vast majority of standard kitchen rooms. One-wall, peninsula, and island layouts are typically treated as variations or additions built onto one of those three base shapes.
What Are Kitchen Layouts Called in Design Terms?
Designers refer to layouts by their counter arrangement: one-wall (single-line), galley (parallel), L-shaped, U-shaped, G-shaped, peninsula, and island. Some designers also use the term "zone-based" layout to describe a kitchen planned around functional areas rather than a fixed shape.
How Wide Should a Kitchen Work Aisle Be?
The NKBA recommends a minimum 42 inch aisle for a single cook and 48 inches where multiple people cook regularly. Islands need at least 42 inches of clearance on every side to stay comfortably walkable during meal prep.
Does My Kitchen Layout Need to Meet Accessibility Standards?
It depends on your home type and any covered housing requirements that apply to your property. The Fair Housing Accessibility Guidelines require 30 inch by 48 inch clear floor spaces at appliances and a 60 inch turning diameter in some U-shaped kitchens, and local codes can set even stricter dimensions, so check with your permitting office before finalizing your plan.
Can Buildwithng Help Me Change My Kitchen Layout?
Yes, Buildwithng handles kitchen and bath remodeling and room additions across Southwest Florida, managing design, permitting, and construction as one accountable team. Current pricing depends on project scope, and every project starts with a free, no-obligation estimate.